

Watch our video on how to put up a fence with concrete posts and bases
Following these steps will enable you to plot, prepare and erect your fence posts and panels.
1. Getting started
Clear the new fence line of all old fencing, bushes, shrubs and debris.
2. Marking up
Mark the position of any suspected drains or services.
3. Measuring
Measure the line, marking rough post positions and check levels to determine the best place to start fitting the fence.
a) One end of the fence line (the finish point) will usually require a short panel which can be cut to size and then slid into place (beware of overhanging trees or the eves of the house).
b) If the ground slopes, it is always much easier to start at the highest point and work downhill (the posts are set to the height of the fitted panel instead of the panel to follow).
4. Digging out your first post hole
a) This may not be necessary if you can work from an existing post.
b) If you are working from a wall or other vertical surface you can use a uchannel or a post screwed/bolted into place.
c) Calculate the total height of your fence panel plus base panel(s) and add 1 1/2" (the post looks better finishing above the panels ) then mark the inside of the slot (this should be the point on the post where the bottom of the panel will sit).
d) Measure the post below the mark and add 1" (3ft fence = approx 29" 4ft to 7ft fence = approx 22" 8ft fence = approx 25").
e) Dig a shallow trench to accommodate your first base panel (the trench should be level and be a minimum of 1" below the surrounding ground level).
f) Carefully dig your post hole (This should be approx 9" sq and the measurement guided by section d - above) below the bottom of the trench.
5. Mix the concrete
a) Add and mix 1 1/2 shovels full of cement to 1 bag of scalpings then add water to achieve an even and firm but sticky consistency.
b) If using postmix add the water as per instructions on the bag.
6. Setting your first post
a) Put approximately 1/2 a shovel of concrete into the hole to give a 2" depth.
b) Gently lower and position the post into the hole checking using a level that it is upright and the mark in the post slot (from section 4 c) should be just above the height of the trench.
c) Add more concrete around the post and compact using a podger (technical term for a thick batten used to push and compact "podge" the concrete into the hole).
d) Fill the hole around the post with concrete to just under ground level and in the slot to just above the mark (from section 4 c).
7. Setting a stringline
Set up a string-line approximately 2' above the ground to run about 1/8" off your first post to the same point on your projected last post.
8. Mark & Dig your next hole
a) Place a 6' top rail in the trench to represent the fencing section and put a flat flag or brick etc. in the trench approx 4" back from the end and approx 2" below the top of the fresh concrete in the slot.
b) Looking down the string-line keeping the side of the post below the string-line parallel with the string move the toprail so that it also runs parallel , The toprail now represents the correct position for the concrete base.
c) Mark the position required for the post hole, remove the toprail and dig the hole (This should be approximately 9" square and the measurement (guided by section 4d above) below the bottom of the flag.
9. Setting up your first fence section
a) Put your concrete base panel into position, it should rest on the flag and slide down the slot into the mix ,line it up using the string (as stated in 8a) you can now put a level on the concrete base and fine tune as necessary.
b) Using a rubber maul tap the base into the concrete mix until it sits at the correct height , then if required lift the other end using slate between the base panel and flag.
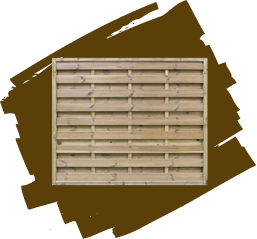
c) Put further bases (if required) and or your fence panel onto the base and into the post slot.
10. Fitting your next post
a) Put approx 2 " of concrete into the hole and measure to check that the post will sit at the correct height allowing for the post to bed 1" into the concrete.
b) Hold your post with the slot against the fencing section and holding it level, slide the post down the section and into place.
c) Using a level and the stringline fine tune the position of the bottom of the post so that it sits upright against the fencing section and approx 1/8" off the string.
d) If the post sinks too low then you will need to lift it , if it sits a little high this can be remedied afterwards.
e) Add more concrete around the post and compact using a podger (as mentioned above).
d) Fill the hole around the post with concrete to just under ground level and in the slot to allow the next base to be bedded into it at the correct height.
e) If required, tap the post down using the rubber maul until at the correct height.
Repeat sections 8 to 10 until you reach the end of the fence line.
11. Fitting the rest
Repeat sections 8 to 10 until you reach the end of the fence line
12. Fitting your last post
a) This may not be necessary if you can work from an existing post.
b) If you are working from a wall or other vertical surface you can use a uchannel or post screwed/bolted into place.
c) Calculate the total height of your fence panel plus base panel(s) and add 1 1/2" (the post looks better finishing above the panels) then mark the inside of the slot (this should be the point on the post where the bottom of the base panel will sit).
d) Measure the post below the mark and add 1" (3ft fence = approx 29" 4ft to 7ft fence = approx 22" 8ft fence = approx 25").
e) Dig a shallow trench to accommodate your last, usually short base panel (the trench should be level and be a minimum of 1" below the surrounding ground level).
f) Carefully dig your post hole (This should be approx 9" sq and the measurement guided by section d above) below the bottom of the trench.
g) Put approx. 2" of concrete into the hole and measure to check that the post will sit at the correct height allowing for the post to bed 1" into the concrete.
h) Lift and lower the post into place.
i) Using a level and the string-line fine tune the position of the bottom of the post so that the post sits upright,up against the fencing section and approx.1/8 " off the string.
j) If the post sinks to low then lift it, if it sits a little high this can be remedied after.
k) Add more concrete around the post and compact using a podger.
l) Fill the hole around the post with concrete to just under ground level and in the slot to allow the short base to be bedded into it at the correct height.
m) If required once the short panel is fitted using the rubber maul tap post down to the correct height.
13. Measure cut and fit your short panel
a) Measure the gap between the post slots and knock off 1/4".
b) Order the short panels to be made from Cocklestorm fencing or c) & d).
c) Cut the concrete base panel using a disc cutter.
d) Cut the fencing panel using a good hand saw or preferably a circular saw then re-batten and nail.
e) Slide the concrete base into the slots and bed into the mix to the correct level then slide the wooden panel in.
14. Benching and Tidying
a) This can be done at the end or as you go along.
b) To bench up you need to place concrete under the end of the base supported on the flag this means both ends of the base panel are concreted directly to the post and will stop any movement over time.
c) Spread the soil removed from the hole along the fence-line to the same level as the existing ground.
And finally...
RELAX!! Job well done!!